Tutorials
How to Remove a Background From an Image
Learn how to remove a background from an image online, choose transparent PNG, white, or custom output, and fix common edge issues.
8 min read
#how to remove background from image#background remover#transparent png#image editing#tutorial
If you need to remove a background from an image, the fastest workflow is simple: upload the image, create a clean cutout, then download a transparent PNG or choose a clean studio background. You can start with the free Background Remover when you need a quick cutout for a product photo, profile image, logo, social post, or design mockup.
The important part is not only clicking "remove." A good cutout also needs the right output format, a quick edge check, and the right next step if the image is going into a marketplace, presentation, website, or catalog.
Quick Answer: How to Remove a Background From an Image
- Upload a JPG, PNG, or WebP image.
- Remove the background around the subject.
- Download the result as a PNG, or choose a white, gray, or custom color background before export.
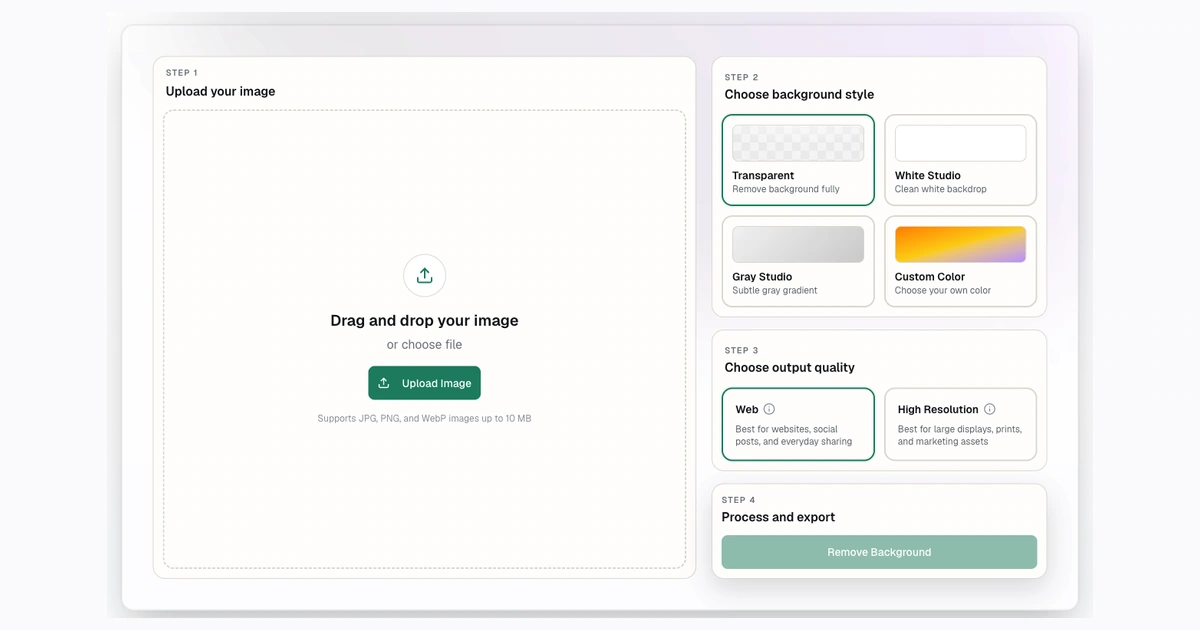
Step 1: Start With the Empty Upload Workflow
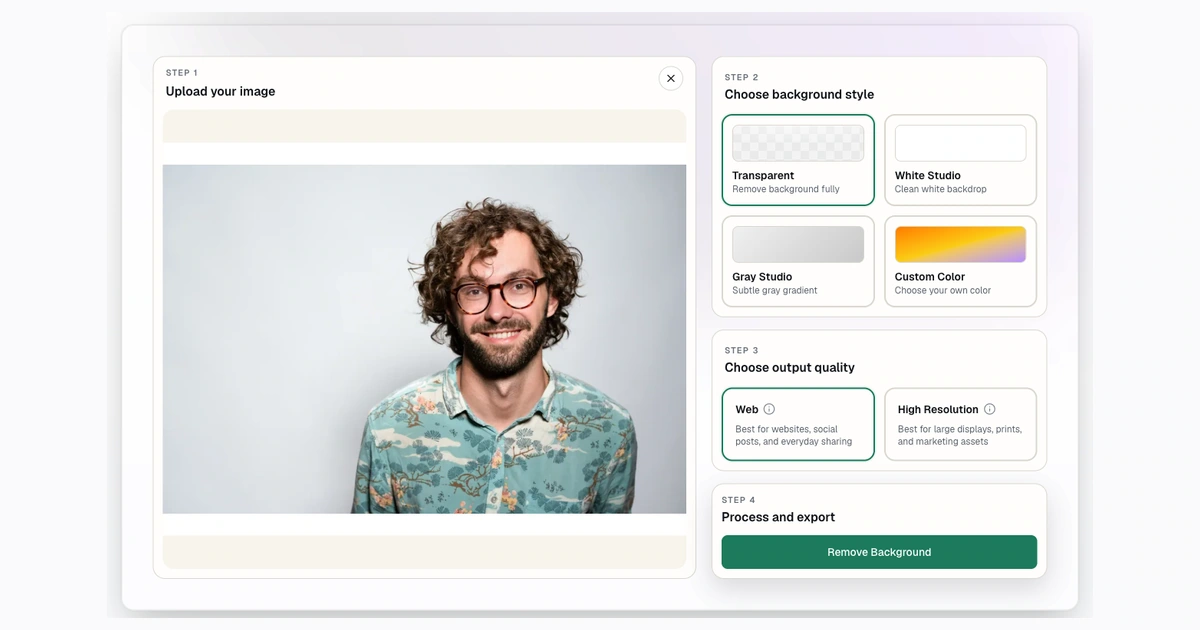
Step 2: Upload the Source Photo
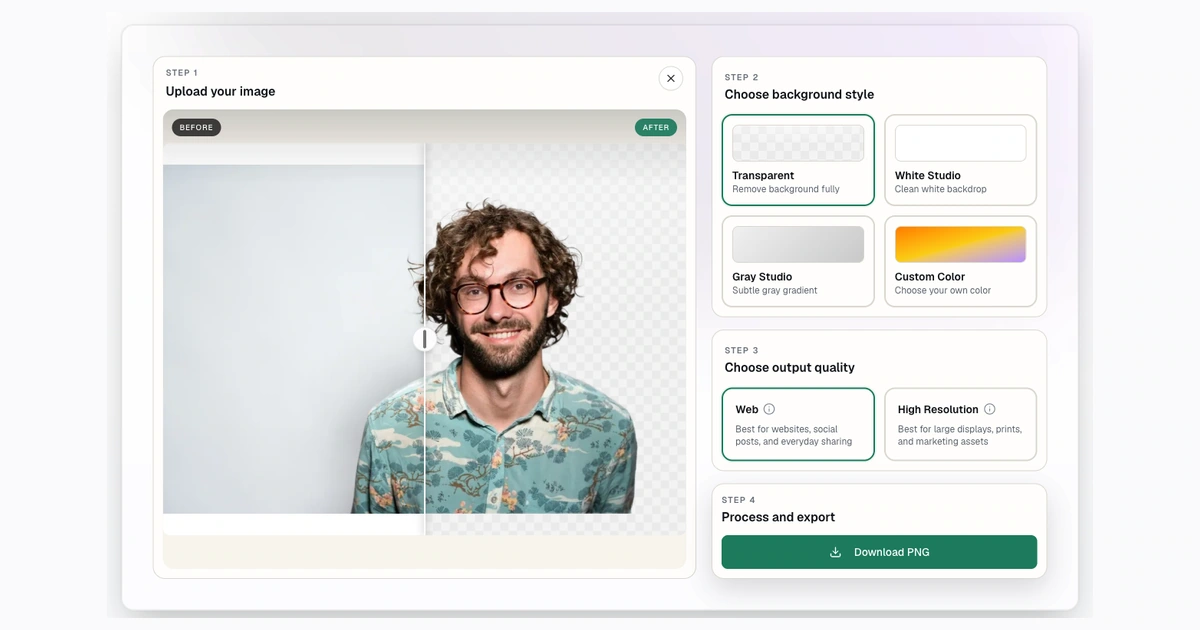
Step 3: Review the Before and After
For most images, transparent PNG is the best first export because it keeps the subject flexible. You can place it on a website, paste it into a design, add a white background for a product listing, or resize it later with the image converter.
Step 1: Upload a JPG, PNG, or WebP
Start with the cleanest original you have. Background removal is easier when the subject is sharp, the photo is not heavily compressed, and the edges are not hidden by motion blur.
Background Remover supports JPG, PNG, and WebP uploads up to 10 MB. If your image is much larger than that, resize it first with the free image converter, then run background removal on the smaller working file.
Good source images usually have:
- Clear separation between subject and background.
- Enough light around fine edges like hair, fur, straps, handles, or transparent plastic.
- A subject that is not cut off by the edge of the photo.
- A file format the browser can handle reliably.
If your first result is not clean, try a sharper source photo before blaming the tool. A cleaner original usually produces a cleaner cutout, and no editing workflow can restore detail that the original photo never captured.
Step 2: Remove the Background
After upload, Background Remover removes the background around the main subject and creates a cutout. This is useful for portraits, products, pets, vehicles, packaging, and objects with a clear foreground.
For a quick public workflow, use the homepage background remover. Paid plans add monthly removal capacity, high-resolution output, and bulk workflows for larger projects. You can compare current plan limits on the pricing page.
This is also where you should decide what the image is for. A transparent PNG is flexible, but it is not always the final delivery format. Marketplaces, print tools, ad platforms, and social apps may prefer a flattened white or solid-color background.
Step 3: Download a Transparent PNG
Transparent PNG is usually the safest default after background removal because PNG can store an alpha channel. That alpha channel is what makes the subject sit cleanly over another background.
Transparent output should stay in a format that preserves empty pixels. If a destination does not support transparency, choose a white, gray, or custom-color output instead. WebP can support transparency, but some older workflows and marketplaces still expect PNG or a flattened solid-background image.
Transparent, White, or Custom Background: Which Should You Choose?
Choose transparent PNG when you need flexibility. It is best for website graphics, logos, profile images, Canva layouts, slide decks, ads, and design systems where the background may change.
Choose a white background when you are preparing a product image for a marketplace or a catalog. Many sellers use white because it looks clean, crops predictably, and keeps product pages consistent.
Choose a gray or custom color background when the subject is white, reflective, or hard to see on pure white. Custom colors are also useful for brand assets and social posts.
Choose resizing when the cutout is finished but the canvas is wrong. For example, ecommerce teams often remove the background first, then resize to 1000x1000 pixels or 2048x2048 pixels.
How to Remove a Background From a Product Photo
For product photos, the goal is not just a transparent cutout. The goal is a useful listing image.
Use this workflow:
- Remove the original background.
- Inspect the edge around the product.
- Choose transparent if the image is going into a design tool.
- Choose white if the image is going into a marketplace listing.
- Resize the final image to the channel's preferred dimensions.
If you are building a product catalog, read the ecommerce-specific guide to remove backgrounds from product photos. It covers white products, reflections, shadows, and square listing images in more detail.
How to Check Edge Quality Before Downloading
Before you publish a cutout, zoom in and check the edges. The most common problems are small halos, clipped hair, missing straps, leftover background between handles, and rough edges around reflective objects.
Check the result on more than one background color. A halo that is invisible on white may show up immediately on blue, gray, or black.
Use this quick QA pass:
- Look around the full subject outline.
- Check fine details like hair, fur, handles, wheels, cords, and jewelry.
- Place the cutout on white and on a darker color.
- Make sure the subject has not been cropped too tightly.
- Confirm the file is really transparent if you need transparency.
How to Remove Backgrounds in Bulk
If you need to process a catalog or a shoot, one-by-one editing gets slow. Background Remover's paid plans include bulk processing, with up to 50 files per batch. The bulk workflow accepts JPG, PNG, and WebP files up to 10 MB per file. Finished results can use transparent, white, gray, or custom-color output.
Use bulk processing when the images are similar, the output style is consistent, and you want a ZIP download at the end. Use the single-image workflow when one image needs more careful review.
For the full batch process, see the bulk background removal workflow.
Common Problems and Fixes
The result has a faint outline
Try previewing the cutout on a different background color. If the outline is from the original photo, use a cleaner source image or choose a background color that hides the edge better.
The image looks blurry after export
Use high-resolution output when the final image needs detail. If the destination has an exact pixel requirement, resize after background removal instead of enlarging a small final file.
The background looks transparent but is not
A checkerboard pattern can be a preview, not proof. Download the file and open it on a colored background. If it shows a white rectangle, the file was flattened.
The product disappears on a white background
White or reflective products often need a faint shadow, off-white background, gray background, or custom color to keep the shape visible. For marketplace main images, check the current channel rules before adding styling.
FAQ
Can I remove a background from an image for free?
Yes. You can use Background Remover to remove a background from an image online. Paid plans add higher monthly limits, high-resolution output, and bulk processing.
What is the best format after removing a background?
PNG is best when you need transparency. For product listings, choose a white or solid-color output when the destination does not support transparent images. WebP can be useful for web delivery, but check whether your destination supports it.
Does a transparent background work on every marketplace?
No. Some marketplaces or upload workflows flatten transparent images or do not support transparency as expected. For product listings, a white or solid background is often safer.
What should I do after removing the background?
Resize the image for the destination. Product photos often use square sizes such as 1000x1000, while social images may use 1080x1080.
Which tools should I compare if I am choosing a background remover?
Start with the comparison posts for Remove.bg vs Background Remover, Canva vs Background Remover, and Photoroom vs Background Remover. Those cover quality, pricing, and workflow differences.
Try Background Remover Today
Remove 50 backgrounds each month for $5.
Related Posts
Continue reading our latest insights
Tutorials10 min read
Resize Image to Exact Pixels After Background Removal
Resize clean cutouts to exact pixels after background removal. Compare 1000x1000, 2048x2048, fit modes, formats, and square exports.
Read more
Tutorials6 min read
Transparent Background Maker: How to Make an Image Background Transparent
Make an image background transparent and download a real PNG. Learn formats, checkerboard previews, transparency tests, and common cutout fixes.
Read more